

Tuesday, March 26, 2013
The big long bike.
Well it's been a long time since a post from me. Almost a year to be exact. Not much going on, raising kids, sewing a little and dreaming about a long tail cargo bike. So now, my dreams realized, this little sewing blog may morph into a family bike riding blog....with some sewing. I have been following blogs lately that have been using cargo bikes to haul their kidlets around and I was impressed. Really impressed. Some families used their bikes as a second means of transportation, others opted to be car free altogether. Some families traveled the world on their cargo bikes with their kids. So awesome and what a way to enjoy life! So here begins our family adventure. I may spend more time outside than behind the sewing machine. But that's ok. I am loving where this family adventure may take us! Today marked the first day of our family ride on a Surly Big Dummy and it was a blast! Woot!


Friday, March 9, 2012
Beginner Sewing at Center 64- March 26, 27th & April 2,3/12
Come join me for Beginner Sewing Series at Center 64, Kimberly, BC
This project is an easy, yet will test the beginner's skill at sewing around a curve, adding lining and top stitching for a nice finish. The fabric buckets below were featured in the Spring edition of Stitch Magazine and are lined with oilcloth so they can be used for plants or other potentially messy items. I didn't have oilcloth at the time when I tried the pattern but I would love to give it a try for the class. Below is my version without the oilcloth.
Day 2 - There will be two options day 2. Option 1 is a patchwork potholder, which gives participants experience with stitching straight lines, patchwork piecing, and sewing through thicker layers. Option 2 is a bit more involved but would be very useful to decorate your sewing space. It involves making a simple patchwork pouch that is secured by a large embroidery hoop. Option 2 would enhance the same skills mentioned above for option 1. Below is a collage of some of my favorite Flickr finds for both options.

1. {SUTK} received - hotpads!, 2. _MG_3553, 3. Pot Holders, 4. happy scrappy pot-holder, 5. Hanging Hoop Wall Pocket Swap, 6. Hanging hoop swap, hope you like it, 7. Hanging Hoop Wall Pocket Swap, 8. Apple Hot Pad, 9. Hot pads
Day 1- Sewing Machine Basics, Basic Stitching and Finishing, Fabric Layout & cutting, Project Planning
Day 2- Project 1- Fabric bucket
Day 3- Project 2- Patchwork potholders or Hanging Hoop Pocket for sewing supplies
Day 4- Handbag or simple bias A-line skirt
Day 2- Project 1- Fabric bucket
Day 3- Project 2- Patchwork potholders or Hanging Hoop Pocket for sewing supplies
Day 4- Handbag or simple bias A-line skirt
Supplies:
Required
- Sewing Machine in good working order
- Fabric Scissors
- Straight pins
- measuring tape
- neutral colored thread such as light grey, or white.
- Fabric marking pen or dressmaker's chalk
- seam ripper
- rotary cutter and mat
This project is an easy, yet will test the beginner's skill at sewing around a curve, adding lining and top stitching for a nice finish. The fabric buckets below were featured in the Spring edition of Stitch Magazine and are lined with oilcloth so they can be used for plants or other potentially messy items. I didn't have oilcloth at the time when I tried the pattern but I would love to give it a try for the class. Below is my version without the oilcloth.
Day 2 - There will be two options day 2. Option 1 is a patchwork potholder, which gives participants experience with stitching straight lines, patchwork piecing, and sewing through thicker layers. Option 2 is a bit more involved but would be very useful to decorate your sewing space. It involves making a simple patchwork pouch that is secured by a large embroidery hoop. Option 2 would enhance the same skills mentioned above for option 1. Below is a collage of some of my favorite Flickr finds for both options.

Wednesday, February 29, 2012
Friday, February 24, 2012
Fabric Containers from Spring Issue of Stitch
I received my Spring edition of Stitch Magazine and loved the oilcloth lined fabric containers (1rst photo shown below) immediately!
I quickly set to work to try the project out despite not having any yummy Echino fabric or oilcloth for that matter. I also didn't have any heavy fusible interfacing either! So I just paired contrasting cotton quilting weight fabric and used cotton batting as my interfacing. I am happy with the result in a "ok. Not as flashy and eye catching as the original" but I am happy with the pattern. The pattern comes in two sizes and I made the larger one. It would definitely fit a nice. Medium sized plant if that is your intention. I think the smaller one would be great for pencils and craft items. The larger one I could definitely see myself using it for sorting small toys with the kids. This was the first time sewing a circle bottom bucket and thank goodness I am taking Stitched in Color's Curves class. My circle needs a bit of work. I will definitely do this project again using oilcloth and heavier fabric for the outer. I have already scoured Etsy for those hard to find Echino prints of last season.


I quickly set to work to try the project out despite not having any yummy Echino fabric or oilcloth for that matter. I also didn't have any heavy fusible interfacing either! So I just paired contrasting cotton quilting weight fabric and used cotton batting as my interfacing. I am happy with the result in a "ok. Not as flashy and eye catching as the original" but I am happy with the pattern. The pattern comes in two sizes and I made the larger one. It would definitely fit a nice. Medium sized plant if that is your intention. I think the smaller one would be great for pencils and craft items. The larger one I could definitely see myself using it for sorting small toys with the kids. This was the first time sewing a circle bottom bucket and thank goodness I am taking Stitched in Color's Curves class. My circle needs a bit of work. I will definitely do this project again using oilcloth and heavier fabric for the outer. I have already scoured Etsy for those hard to find Echino prints of last season.
Thursday, February 23, 2012
Project 5 Rainbow Road.
I was so pleased with this project designed by Rachel of Stitched in Color. This runner was the reason I signed up for her class. It took a bit of trial and error to get the curves just right but in the end I love the way it flows. It looks wonderful on our junk shop round table that has a 1/2 inch gap down the middle. Now on to the next project!


 Pin It
Monday, February 20, 2012

Sunday, February 12, 2012
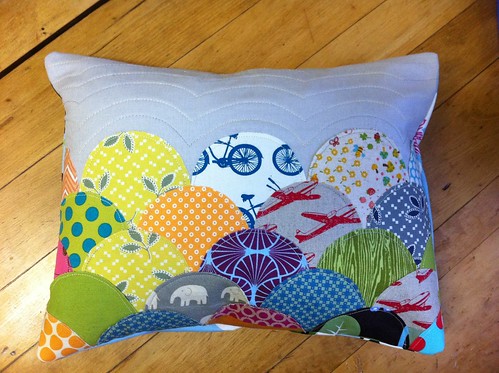
Clamshell Pillow Preview
Late last night I started my clamshell pillow for the Curves Class from Stiched in Color. I hope I don't get into trouble....I am not following the instructions exactly. I decided to reinforce my clamshells with Seam to Seam double sided fusible web. Then I will iron them on and sew them right on to the pillow. I am sooo greatful to a really sweet friend in Fernie who sent me a bag of scraps. I love how nothing really matches but it somehow goes together. Stay tuned for the final project!
Thursday, February 9, 2012
Project 1 Stitched in Color
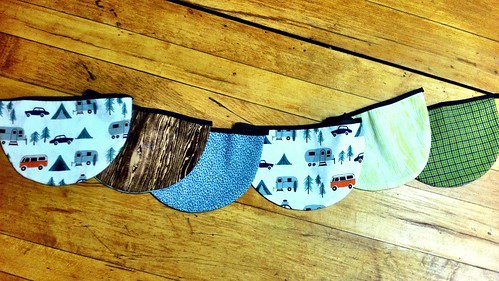
I am taking a class from Rachel from Stitched in Color on sewing curves. I am really enjoying it and love the fact there are multiple projects to work on. It forces me to start and finish things that I haven't thought to try. I am also making a good dent in my scraps. The first project was a curved bunting for Quinn's room. I especially love to see what everyone else is making and I am browsing the Stitched in Color Flickr group incessantly! Fantastic work everyone!
Thursday, February 2, 2012
Stitched in Color - Premium Curves Class
I am so happy I was able to sign up for Rachel's Premium Curves Class. I am not an experienced quilter and most of my sewing has been for my children and some clothes for me. I am addicted to quilting though and I really would love to make it my passion. It never occurred to me until recently to take an online course and it is just what I need! As a mom to 2 young kids I can't always get out to the local quilt shop to learn from others. This opportunity fits my life right now and I am so grateful!
As for sewing curves. I have tried on 2 occasions, once using this tutorial by Sewtakeahike.
I actually ended up with a mug rug looking nothing like her block so I gave up and it became what it is today....Then I tried a block inspired by this tutorial and didn't get far as I ended up moving away from the curved piecing. At any rate, I am excited to have the guidance (and inspiration) from others and structure to conquer my fears and complete a project!

As for sewing curves. I have tried on 2 occasions, once using this tutorial by Sewtakeahike.
I actually ended up with a mug rug looking nothing like her block so I gave up and it became what it is today....Then I tried a block inspired by this tutorial and didn't get far as I ended up moving away from the curved piecing. At any rate, I am excited to have the guidance (and inspiration) from others and structure to conquer my fears and complete a project!
Sunday, January 22, 2012
Wonky Pound
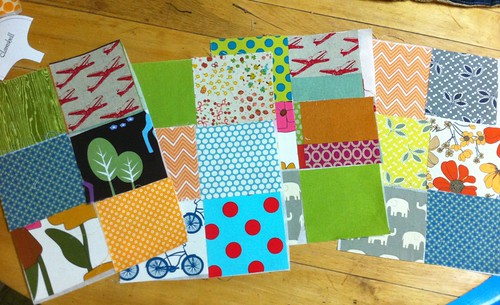
The slash blocks featured in the online course are so simple I am giddy!! It's so addicting and since I can't wait till next month I am going to make doubles and maybe make the quilt bigger?


Craftsy Block of the Month with Amy Gibson

I am super excited to be doing a free online course by Amy Gibson featuring various techniques. January featured "slash blocks", a quick and easy way to end up with complicated looking blocks. I am really glad I ventured to do this. I usually don't start major quilt projects as I like a quick fix. I am more likely to make up a pair of baby/toddler pants or work on a hat so I can see immediate results. I am so fond of quilting though and really would love to accomplish more than I have. I am finding with this course I can get a block done during my kid's naptime and then eagerly await the next lesson! There are two blocks in January and this morning I completed the asterix block. In the video, Amy uses white as the background color but all I had on hand was a dark gray. Tonite I hope to finish the wonky pound sign and post pictures.
Friday, January 20, 2012

Saturday, January 14, 2012
DIY Pincushion Kits
I put together a few do it yourself weighted pincushion kits for sale at Natural Attractions in Kimberley. Each kit contains all the supplies to make your own 9 patch pincushion. I am also using these kits for the Sewing for Beginners class at Center 64 in Kimberley, BC. 

Hat for Quinn that stays on!
I made this cute newsboy hat with earflaps for Quinn. It perfect! No, I am not bragging about my sewing skills, I simply impressed that it stays on, protects his cheeks from scratchy zippers and is warm! I thrifted a tweed blazer and lined it with fleece. It's snug enough that it doesn't shift around yet will fit him for awhile. Ilan looked pretty cute in it as well! 


Thursday, December 22, 2011
Now for some finished projects!
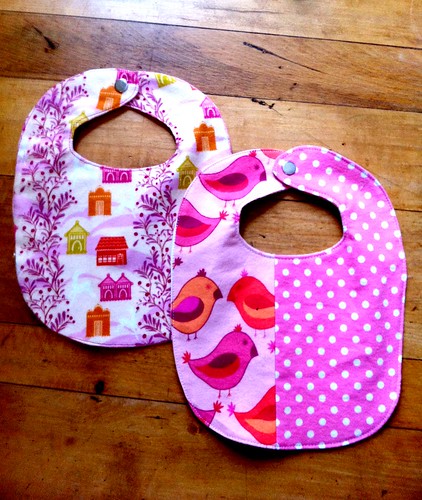
So despite the long list of unfinished projects, I still insist on starting something new. Sometimes it's nice to whip up quick, easy items that satisfy the sewing urge without expending too much time.


Unfinished projects.
To make myself somewhat accountable to finish that long to do list, I thought maybe by posting pictures this would spur me on to show you all the end result.
So here we go! A mug rug with a screen printed mug. Binding for mini quilt. Toddler skirt with screen printed bird pocket. Hexagon placemat.


So here we go! A mug rug with a screen printed mug. Binding for mini quilt. Toddler skirt with screen printed bird pocket. Hexagon placemat.
Tuesday, December 20, 2011


Subscribe to:
Posts (Atom)